

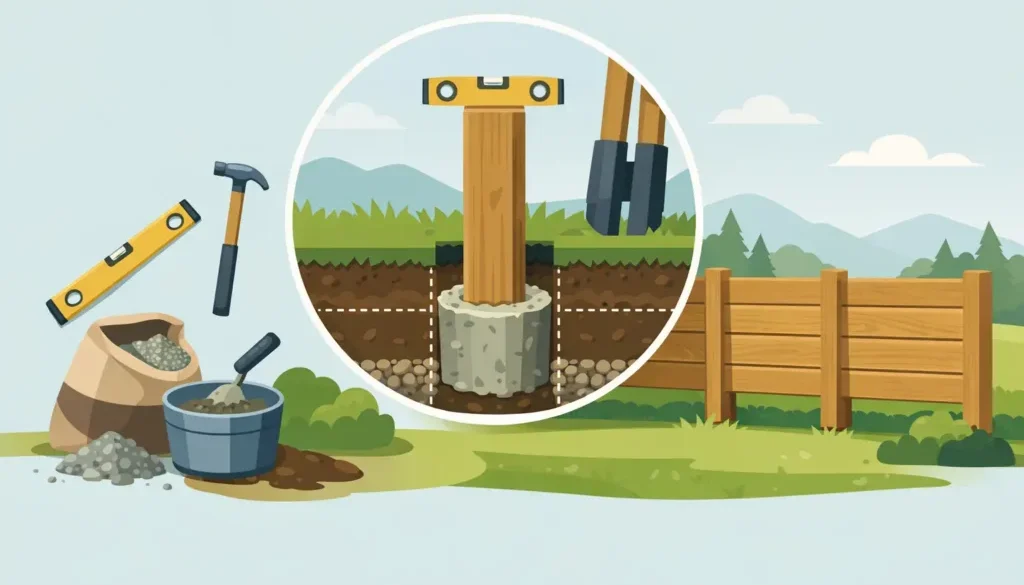
A wood fence only performs as well as its posts. When posts lean, heave, or rot early, the whole fence starts to fail with them. If you are researching how to install post for wood fence, the real goal is not just getting a post into the ground – it is building a fence line that stays straight, secure, and durable through years of weather.
In Minnesota, that matters even more. Freeze-thaw cycles, shifting soil, drainage issues, and strong winds can all test a fence installation. That is why post installation is the part of the job where precision matters most.
How to Install Post for Wood Fence: Start With Layout
Before digging anything, establish the fence line carefully. String lines, corner points, and gate openings need to be marked first so the spacing stays consistent from one end of the project to the other. A small layout mistake at the beginning usually becomes a much bigger visual problem once rails and pickets go up.
Most wood fence posts are spaced 6 to 8 feet apart, depending on the design, local site conditions, and the style of fence being installed. A privacy fence with solid pickets creates more wind load than a more open design, so spacing and post sizing should match the demands of the fence.
Gate posts deserve special attention. They carry more weight and more movement than line posts, so they often need deeper footings, heavier posts, or added reinforcement. Treating every post the same is one of the most common reasons fences start to sag or shift around the gate.
Choose the Right Post Material and Size
For most wood fence projects, pressure-treated lumber is the standard choice because it is built to handle ground contact and outdoor exposure. The post size depends on the fence height and use. A typical residential privacy fence may use 4×4 posts, but taller fences, heavier designs, and gate openings often call for 6×6 posts for added strength.
This is one of those areas where cheaper up front can cost more later. Undersized posts may look fine on installation day, but over time they are more likely to twist, move, or fail under wind and seasonal soil movement.
If appearance matters as much as performance, make sure the post material is straight and in good condition before it goes into the ground. Rails and panels can only look as clean as the framework supporting them.
Digging the Post Holes Correctly
Depth matters more than many property owners expect. A common rule is to bury about one-third of the total post length, but actual depth should also account for fence height, soil conditions, frost depth, and wind exposure. In colder climates, shallow post holes can lead to frost heave and noticeable movement over time.
For a 6-foot wood fence, post holes often end up around 30 to 42 inches deep, and sometimes deeper depending on local conditions. Hole diameter also matters. A hole that is too narrow limits stability and makes it harder to set the post correctly in concrete.
As a general approach, the hole should be wide enough to allow a solid concrete footing around the post while still keeping the post centered and plumb. Loose, wet, or sandy soil may require more attention than compact, stable ground.
Concrete or Gravel: What Works Best?
When people ask how to install post for wood fence, they usually want a simple answer on whether to use concrete. In most professional installations, concrete provides the strongest and most reliable footing, especially for privacy fences, taller wood fences, and gate posts.
That said, site conditions matter. Concrete adds strength and helps lock the post in place, but poor drainage around the base can still create moisture problems if the installation is not done properly. Some installers use compacted gravel at the bottom of the hole to support drainage before the concrete is placed.
A fully concrete-set post is often the better choice when durability and rigidity are priorities. Gravel-only methods may be used in some lower-load applications, but they generally offer less long-term resistance to movement. For most wood fence projects where appearance and service life matter, concrete is the safer investment.
Setting the Post Straight and Secure
Once the hole is dug, place the post and check it with a level on at least two sides. Brace it before adding concrete so it does not move during the pour. Even a slight shift can throw off the line of the entire fence.
Consistency matters here. The tops of the posts should align with the planned fence height and slope, and the faces of the posts should stay in line with the string line. If posts are set at uneven heights or slightly out of alignment, the problem carries through every rail and picket that follows.
Concrete should be placed around the post and finished so water sheds away from the base rather than pooling around it. That simple detail helps reduce long-term moisture exposure. After setting, give the concrete enough time to cure before attaching rails or panels. Rushing this step can loosen the post before the footing has fully developed strength.
Common Mistakes That Shorten Fence Life
A lot of fence problems can be traced back to the posts. One common issue is setting posts too shallow. Another is failing to account for drainage, which can leave the post base exposed to constant moisture. Poor spacing, weak gate support, and skipping proper bracing during installation also create trouble later.
There is also the temptation to focus on speed over accuracy. A fence can go up quickly and still perform poorly if the posts are not installed correctly. Straight lines, solid footing depth, and careful leveling do more for the life of a fence than any shortcut ever will.
Using the wrong type of wood is another avoidable problem. Ground-contact pressure-treated posts are designed for burial. Standard lumber is not. Choosing the right material from the beginning protects the structure and reduces the risk of early rot.
Soil, Frost, and Drainage Change the Job
No two properties install exactly the same way. Clay-heavy soil holds moisture differently than sandy soil. Sloped yards create their own layout and drainage challenges. Areas with freeze-thaw cycles need careful footing depth and stable installation methods.
That is why post installation is not really a one-size-fits-all process. A method that works on one lot may not be the best choice on another. Professional fence installers look at grade, drainage, frost exposure, and fence design together before deciding how each post should be set.
For homeowners and property managers, that can be the difference between a fence that looks good for a season and one that keeps its line for years.
When Professional Installation Makes Sense
If the project involves long runs, uneven terrain, difficult soil, or heavy gate systems, professional installation usually saves time and helps avoid expensive corrections. The same is true for commercial and industrial properties, where security, access control, and appearance all depend on consistent, durable construction.
A properly built wood fence should do more than mark a boundary. It should improve privacy, strengthen security, and add value to the property. That starts below grade, with posts installed to match the site and the demands of the fence.
Boulevard Fence works with property owners across the Twin Cities who want fencing built for long-term performance, not just quick installation. Whether the goal is backyard privacy or a more secure perimeter, strong post installation is what gives the entire project its foundation.
Final Thoughts on Wood Fence Post Installation
If you want the best answer to how to install post for wood fence, focus less on the visible boards and more on what supports them. The post depth, footing method, spacing, drainage, and alignment all shape how the fence will look and how long it will last. Get those details right, and the rest of the fence has a much better chance of staying strong, straight, and attractive year after year.